Vending Machine Glass Replacement Cost + DIY Guide
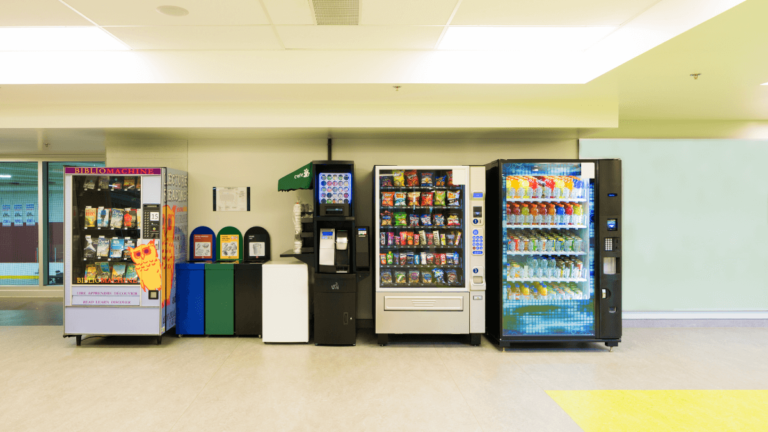
If you own even one vending machine long enough, the glass will eventually break, crack, or get scratched up.
I’ve dealt with this more than once, and I’ll be direct with you: replacing vending machine glass is not complicated.
Vending Machine Glass Replacement Cost
Let’s start with the number everyone cares about, and that is how much it’s gonna burn your wallet.
| Glass Type | Average Cost (USD) | Notes |
|---|---|---|
| Single-pane tempered glass | $45 – $80 | Mostly used in common snack & drink machines |
| Acrylic (plexiglass) | $40 – $90 | Scratches easily |
| Polycarbonate (Lexan) | $80 – $150 | High impact resistance |
| Dual-pane insulated glass | $350 – $700+ | Refrigerated machines |
| OEM branded glass | $250 – $700 | Model-specific |
I suggest you go to your Local glass shops as they are often cheaper than vending parts suppliers. I’ve personally paid around $50–$60 for custom-cut tempered glass locally, compared to $100+ online.
And you also have to add Labor from a technician, which will typically add $100–$250, depending on location.
If you DIY, your real cost is just the panel.
Types of Vending Machine Glass (And What I Actually Recommend)
Vending machines do not all use the same material. Choosing the wrong one causes repeat breakage.
1. Tempered Safety Glass
This is the factory standard, and they have its good and bad.
It is what a basic glass provides,
- Strong and rigid
- Scratch resistant
- Clear visibility
- Required by many operators
But they shatter completely when broken and cannot be repaired once cracked.
I would recommend this for indoor locations, offices, hospitals, and schools. It’s good enough for most machines.
2. Acrylic (Plexiglass)
I would recommend this if you wanna do a DIY replacement option.
They are Easy to cut, Available at hardware stores, and are also Lightweight.
But it also has it’s own downsides as it Scratches fas, get Brittle under impact, and also sometimes Clouds over time.
I have used this for short-term fixes, but it works.
3. Polycarbonate (Lexan)
This is the vandal-resistant option which glass option makes the most sense for your setup.
The thing about polycarbon is that they are extremely impact resistant and rarely shaters. But again, yo will have to put up with scratches as it gets easily scratched and flexes under force.
Another thing is that it is also more expensive.
How Broken Is Too Broken to Fix the Glasses?
Well, it depends, and there are many things to look for before going in to replace.
Replace Immediately If You See:
- Any crack in tempered glass
- A hole or spider-web fracture
- Sharp edges or missing chunks
- Panel flexing or loose seating
Cracked tempered glass will fail completely. There is no safe delay.
What About Scratches: Replace or Leave It?
You can leave it alone if:
Scratches are surface-level
Visibility remains clear
No structural damage
You should replace for
- Scratches distort the product view
- Acrylic has deep gouges
- Polycarbonate is heavily hazed
Minor scratches are cosmetic, but Structural damage is not.
DIY: How to Replace Vending Machine Glass Step by Ste
How Broken Is Too Broken?
This is where many owners hesitate.
Replace Immediately If You See:
- Any crack in tempered glass
- A hole or spider-web fracture
- Sharp edges or missing chunks
- Panel flexing or loose seating
Cracked tempered glass will fail completely. There is no safe delay.
Scratches: Replace or Leave It?
You can leave it alone if Scratches are surface-level, Visibility remains clear, and has No structural damage.
You should replace if:
- Scratches distort product view
- Acrylic has deep gouges
- Polycarbonate is heavily hazed
Minor scratches are cosmetic. Structural damage is not.
How to Replace Vending Machine Glass Step by Step
I’ve done this myself, but thats cause my friend Mikey from Vending Auto Texas helps me with it. If you haven’t done this and it’s your first time, have a proper guide or someone to help you.
Here are some tools you’ll need:
- Work gloves
- Screwdriver or nut driver
- Vacuum or broom
- Replacement glass or panel
Step 1: Unplug the Machine
Before touching anything, unplug the vending machine from the wall. Even though you’re working on the door, machines still carry live power inside.
I’ve seen people skip this because “it’s just glass.” That’s how mistakes happen.
Once it’s unplugged, you’re safe to move forward.
Step 2: Open the Door Fully
Open the door as wide as it will go. If shelves block your arms or make it awkward to reach the glass area, pull them out.
You don’t need to remove everything. Just create enough room so you’re not forcing your hands into tight angles. That’s when glass slips.
Step 3: Remove the Metal Trim or Bezel
Look around the inside edge of the door. You’ll see screws holding a metal trim or bezel around the glass.
This is what’s holding the glass in place.
- Remove each screw slowly
- Place them in one container
- Do not mix them with other hardware
Some screws are slightly different lengths. Keeping them together avoids guessing later.
Once the trim is loose, set it aside gently. Don’t bend it.
Step 4: Carefully Remove the Broken Glass
Even tempered glass leaves small pieces everywhere.
Use a vacuum to remove tiny fragments from the door channel. This step matters more than people think. Leftover shards can crack your new panel during installation.
I always vacuum twice. It’s worth the extra minute.
Step 5: Remove the Rubber Gasket
Most vending machines use a U-channel rubber gasket that wraps around the edge of the glass.
Pull it off the old panel slowly. If it’s Soft, Flexible, and not cracked
You can reuse it.
If it’s brittle or torn, replace it. A bad gasket causes rattling and uneven pressure on the glass.
Step 6: Fit the Gasket Onto the New Panel
Lay the new glass or panel flat on a clean surface.
Press the rubber gasket onto the edge:
Start from one corner and work your way around.
Make sure it sits evenly
If the gasket twists or bulges, stop and reset it. Uneven seating is one of the most common causes of broken replacement glass.
Step 7: Insert the New Glass or Panel
With the gasket in place, lift the panel and slide it gently into the door frame.
Keep it straight, let it settle naturally, and do not push hard.
If it doesn’t seat easily, something is off. Pull it back out and check the gasket alignment.
When done correctly, the panel should sit snug without pressure.
Step 8: Reinstall the Trim and Screws
Put the metal trim back over the glass and start threading screws by hand first.
Do not crank them down. Over-tightening creates pressure points that crack glass weeks later.
Snug is enough.
Step 9: Clean and Test Door Operation
Clean fingerprints from the glass so you can inspect it clearly.
Then Close the door slowly and Check alignment.
Now, confirm the latch locks smoothly
If the door binds or feels tight, reopen and inspect the trim alignment.
Once everything feels right, plug the machine back in
Final Advice From One Operator to Another
If this is your first replacement, take photos before removing anything. That alone prevents reassembly errors.
Trust me, i have been there and it can be confusing if you can’t keep track of it.
I called a few local glass shops instead of ordering OEM, and every quote came in way cheaper than I expected. One shop did tempered glass for about $70, cut to size. No reason to overpay unless you’re dealing with a weird dual-pane refrigerated door.
I reused the original rubber gasket and had zero issues. It sat fine and sealed like it always had.
After having the glass broken more than once, I switched to polycarbonate. Since then? No repeat vandalism. One of those things I wish I’d done earlier. I did look at acrylic, too, but after handling it and hearing how fast it scratches, I skipped it.
Also did the install myself. Glad I did, because paying tech labor for this would’ve been a waste, the job is way simpler than it sounds.
Just sharing what worked for me in case it helps someone else avoid burning money.